

If you already have patients, bookings, or sales in another system, bring that data into Clinic Membership once, then Documenti creates or links clinical files when people next book in. You do not need to re-type everyone by hand.
Moving from another system
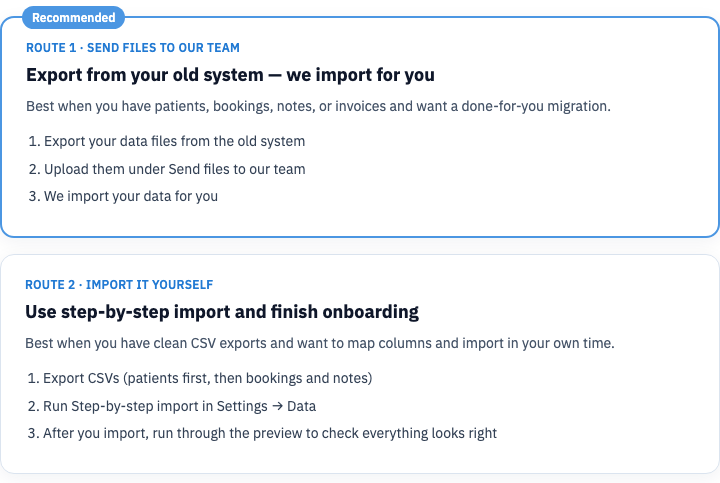
Attach your export under Settings → Data first. Then send files to our team (Route 1, recommended), or use self-guided data import (Route 2).
Tip
Connect Documenti before you go live. See Connect Documenti to Clinic Membership. Matching uses email and phone, so keep those consistent with your old system where you can.
Get your data files ready
Export from your old system before you start. CSV is ideal; Excel, ZIP, or JSON also work when you send files to our team.
- Patients: name, email, phone, and any ID your old system used (plus date of birth or address if you have them).
- Calendar / appointments, past and future visits, with patient identifiers that match the patient file.
- Notes, optional clinical or reception notes linked to those patients.
- Invoices / unpaid invoices, optional sales or outstanding balances.
- Busy / blocked time, if your old diary had lunch or closed blocks.
- Stock / retail products, products and quantities if you track retail.
- Gift vouchers, codes and remaining balances if you sold them.
- Optional: services / treatment list (helps match bookings), and leftover packages or courses.
- If Documenti is connected: clinical notes, photos or treatment maps, consents, professional products, and fridge temperatures when you have them.
Note
For self-guided data import, export patients first, then bookings and notes in separate files when your old system allows: the wizard imports them in a sensible order.
Route 1 (recommended): send files to our team
Best for a full migration when you want us to map and load everything for you.
- Go to Settings → Data.
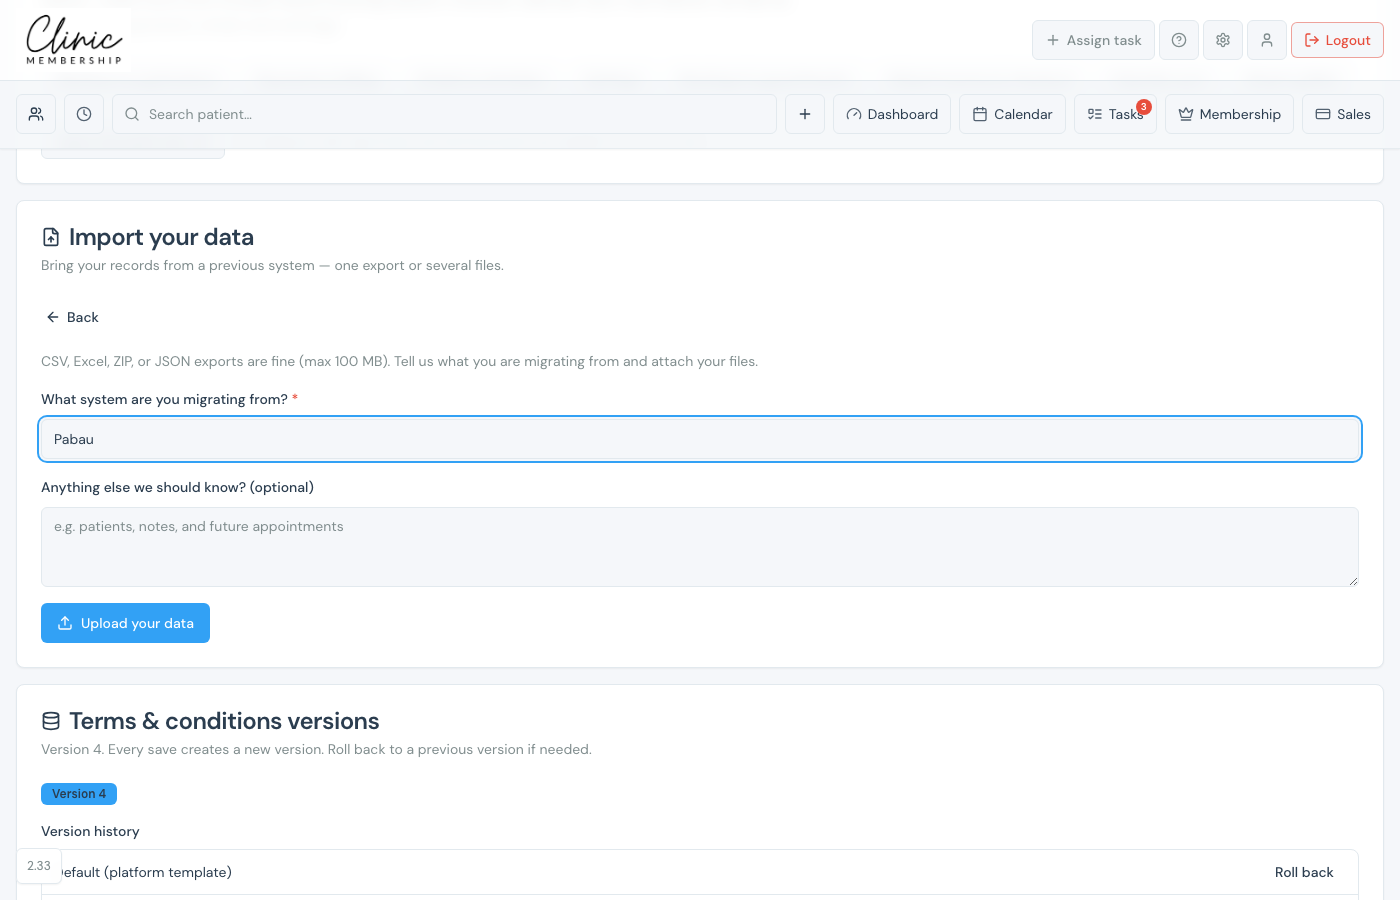
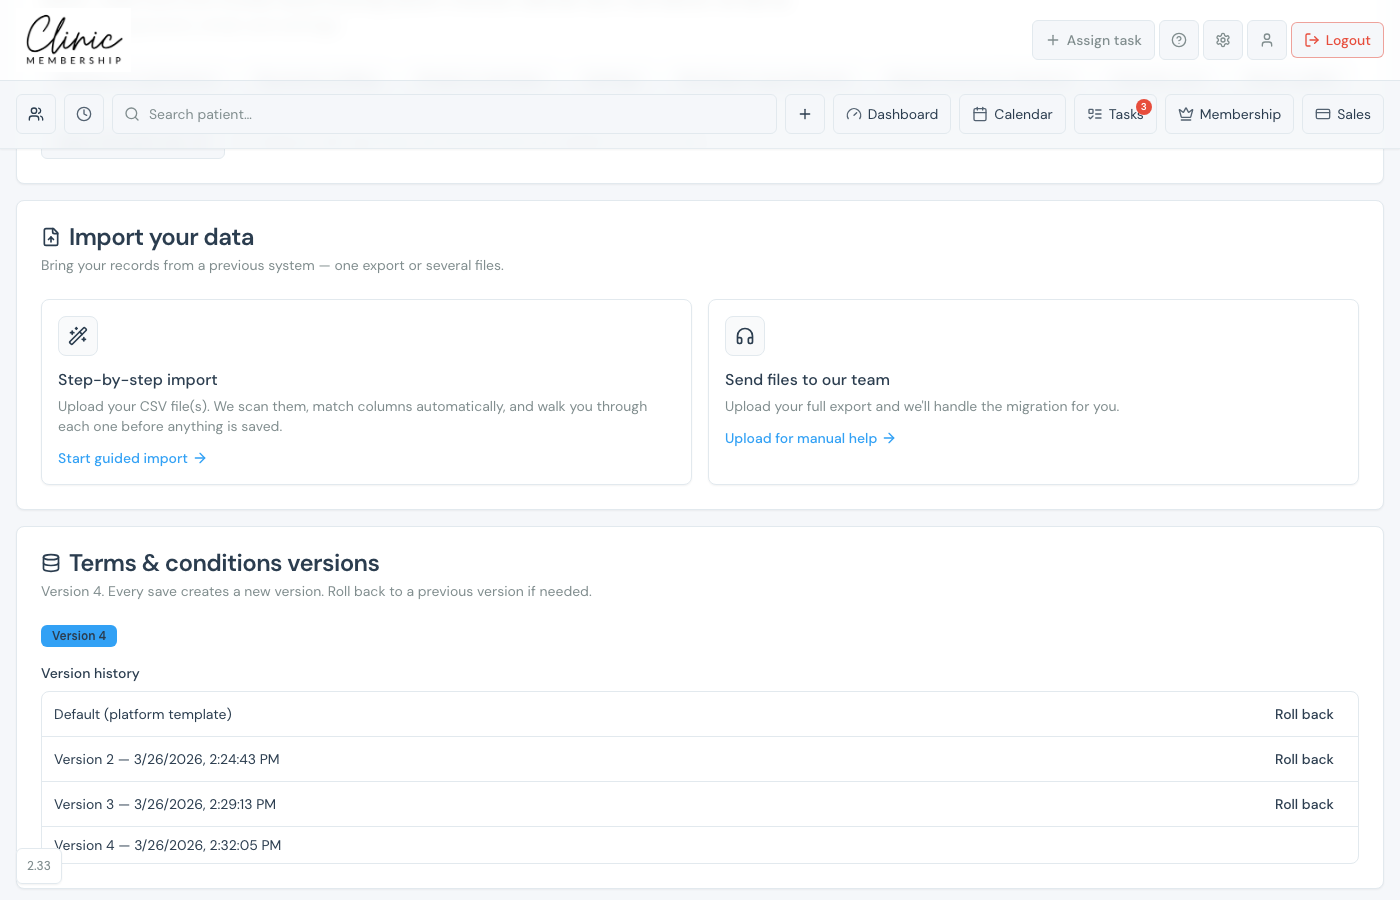
- Scroll to Import your data.
- Attach your export (CSV, Excel, ZIP, or JSON, up to 100 MB each), or forward an export email to the import address shown.
- Optional: tell us which system you are migrating from, and any notes (for example which file is patients vs bookings).
- Open Typical files checklist and tick what you have attached. You do not need every item.
- Click Request our team to import this for you.
- Confirm Have you attached all of your import files? with Yes, request import.
Tip
That confirm step tells us you are ready. You can still add a missing file after you request import. We import this once, so it is better to send everything together. Once patients are on the list, Documenti links each person when they next book in.
Route 2: self-guided data import
Best when you have clean CSV exports and want to map columns and import in your own time, then finish onboarding (services, rotas, Documenti) yourself.
- Go to Settings → Data.
- Scroll to Import your data.
- Attach your CSV file(s) if they are not already listed, then click Start step-by-step import.
- Upload patients first if you have several files.
- Review the scan summary and fix any blocking warnings.
- Match columns (and services or products if prompted), then run through the preview to check everything looks right before you Import.
Note
Need the patient-only column layout? Download the template from Onboard from paper notes, or see Import patients from another system for a shorter wizard-only walkthrough.
After the data is in
- Check a few patient cards in Admin → Patients, names, emails, and phones look right.
- If you imported bookings, open the calendar and confirm upcoming visits.
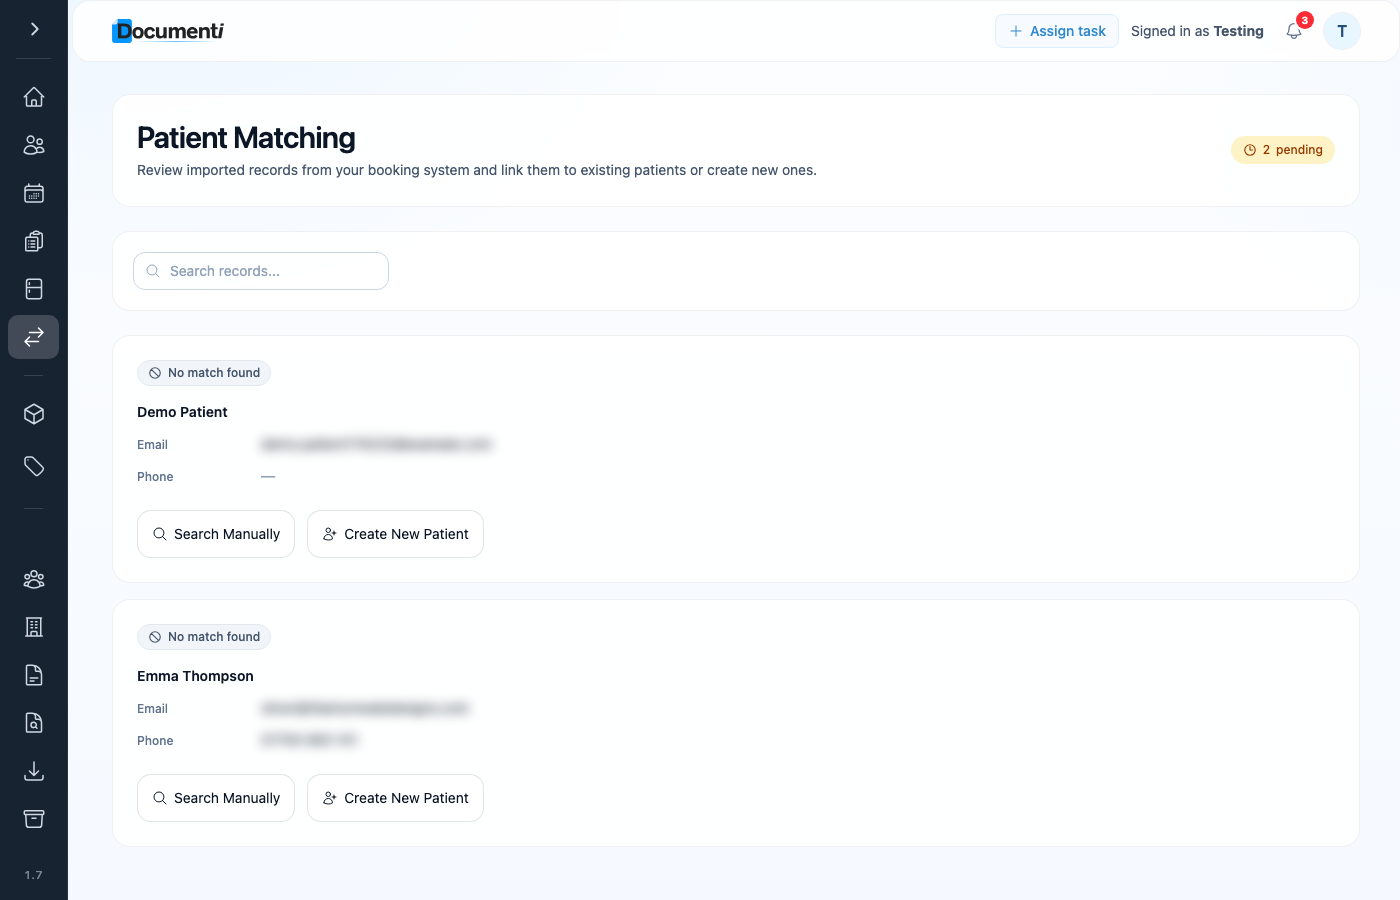
- When someone next books in, Documenti creates or matches their clinical file: use Patient Matching for any pending rows.
- Finish setup: services, staff rotas, reminders, and payments if you have not already.
Which route should you use?
- Send files to our team, multi-file exports, messy headers, or you would rather not map columns yourself.
- Self-guided data import, clean CSVs and you want to control the import and finish onboarding yourself.
- Coming from paper notes instead? Use Onboard from paper notes.
What happens next
Import patients from another system
Short walkthrough of the step-by-step import wizard.
Onboard from paper notes
No old system, bring people across from paper notes.
Connect Documenti to Clinic Membership
Connect Documenti before you go live.
How patient matching works
How Documenti links inbound patients.
Getting started: your first week
Finish the rest of your first-week setup.