
After you add rooms or devices under Settings → Calendar → Resources, you can attach them to individual services. That way a laser facial only books when the laser is free, not just when the clinician is free.
Before you start
- Add at least one resource. See Set up rooms and resources.
- Your bookable services should already exist under Settings → Services.
Attach resources to a service
- Go to Settings → Services.
- Add a new service or click Edit on an existing one.
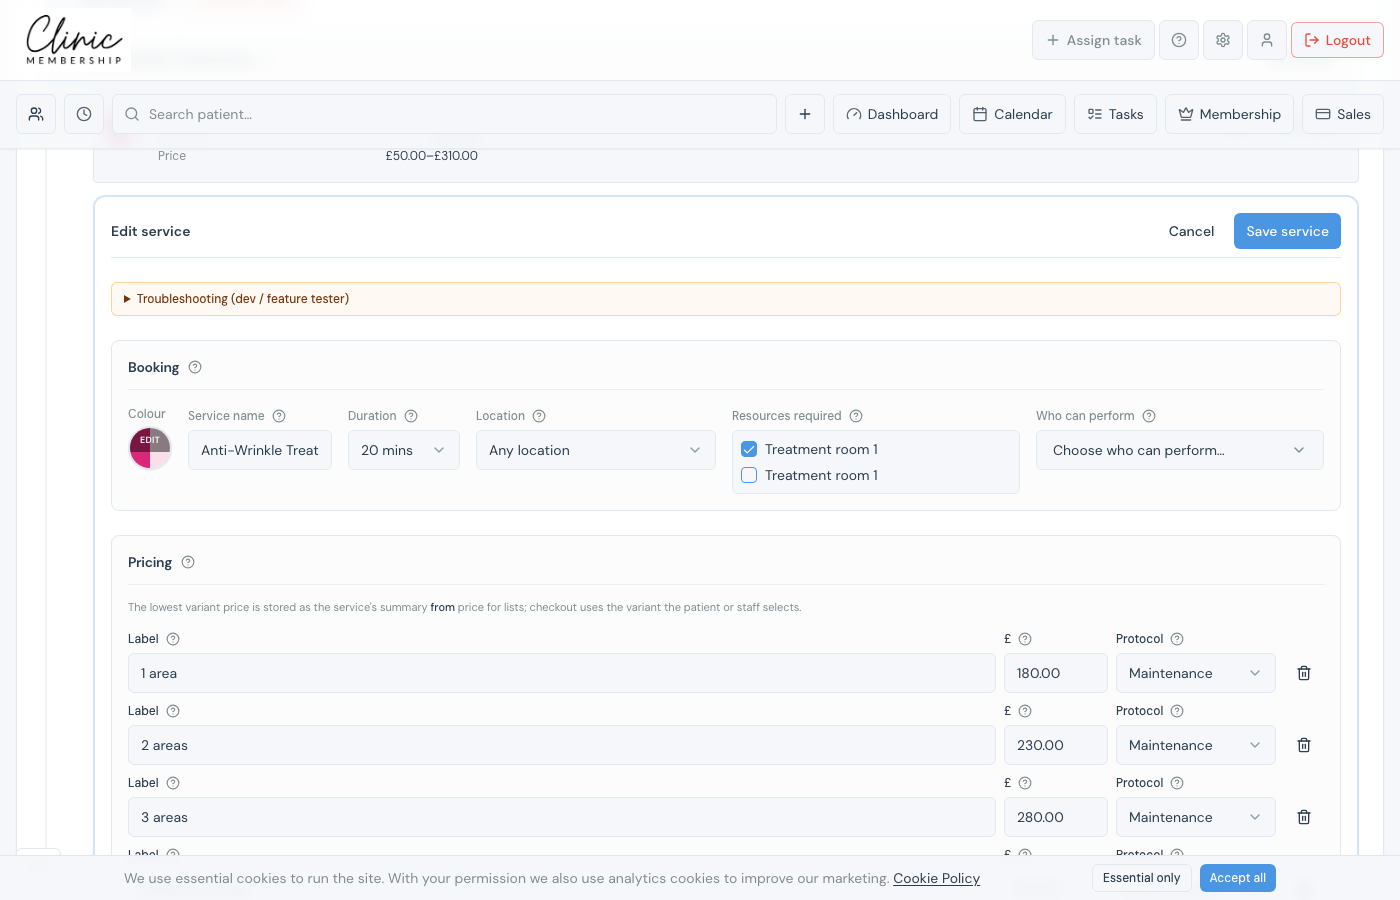
- In the Booking section, find Resources required (this only appears once you have resources set up).
- Tick the room or device this treatment needs.
- One tick. That resource is always used for this service.
- Several ticks: any one of those resources can be used; the system picks a free one automatically.
- Click Save service (inline edit) or Save settings (new service).
What patients and staff see
- Online booking: fewer time slots when the linked resource is busy. Patients are not asked to choose a room: one is assigned automatically.
- Patients can still pick a clinician when more than one can perform the service.
- Admin calendar: when you book from the diary, the resource list is limited to that service’s pool.
Tip
If a service is tied to one location, only resources for that site (or “any location”) appear in the list.