

Opening a second site is a proud moment. It is also the moment a lot of clinic owners realise how much of the first clinic lives in their head. Which room has the laser. Who works where on a Thursday. Whether the new branch has any of the cleanser left. How reception at the new site logs in.
When each site runs on its own notebook, spreadsheet or shared password, you stop running one clinic and start running two small ones that happen to share a name. The fix is not more meetings. It is setting up every site once, in one system, so the same rules apply wherever your team is working.
Here is how to set up a clinic with more than one site in Clinic Membership, step by step, using only what you need.
Why a second site gets messy
Most of the pain is not the extra patients. It is the extra places things can go wrong.
A room gets double used because nobody knew it belonged to the other site. A clinician is offered at a branch they never work at. Stock is counted as one big pile, so the busy site runs out while the quiet one sits on boxes. And the new receptionist uses the owner's login because setting up their own felt like a job for later.
None of that is a people problem. It happens when the system does not know that you have more than one site. So the first job is to tell it.
Start by adding each site as a location
In Clinic Membership, a location is any clinic site you work from: your main clinic, a second branch or a dedicated room suite.
Go to Settings, then Calendar, and scroll to Locations. Enter a name for the site, such as Main Clinic or the name of the street it is on. The slug used in links is generated for you. You can add the address for your team's reference and for patient emails. Click Add location, repeat for each site, then save your settings at the bottom of the page.
Two optional settings are worth a look for each site:
- Appointment buffer. Add extra minutes after each appointment at that location, for travel or room turnover. The calendar blocks that time automatically, so a site with a slower room changeover can have a longer gap than your main clinic.
- Include directions. Write a short "how to find us" note, such as where to park or which door to use. Confirmation and reminder emails then add it under that site's address.
The set up clinic locations guide walks through each screen.
Tie rooms and devices to the right site
Once your sites exist, tell the system what lives at each one. Resources are the shared things your clinic books against: a treatment room, a laser or another piece of equipment.
Under Settings, then Calendar, scroll to Resources. Give the resource a name, choose whether it is a room, a device or another shared resource, and set its capacity (usually one). If you run more than one site, pick which location it belongs to, or leave it available at any location.
That one choice stops the classic mistake of promising the laser at the branch where it is not. Set up your locations first, then your resources, so every room has a home. The rooms and resources guide shows the fields.
Put each clinician where they actually work
Next, match your team to your sites. Under Settings, then Team, you assign locations on each clinician's rota, so the system knows who works where and when. If a treatment is only offered at one site, you can tie that service to a single location in your calendar settings.
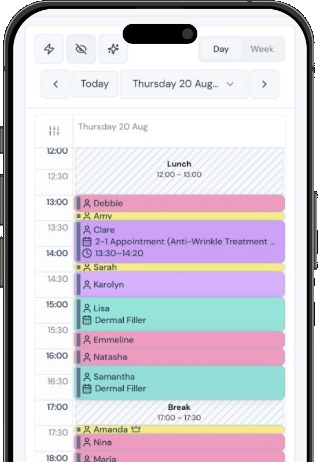
This is where the rest of the setup pays off day to day. With more than one site, a location filter appears on the calendar. You can view all locations on one screen, with each site's name shown on the appointment, or tick one or more sites to focus on them. Patients choosing a time online see a step to pick their site, and they are only offered slots where a clinician actually works. The calendar and location filter guide covers the detail, and we look at the patient side in built-in online booking for aesthetic clinics.
Count stock site by site
Retail stock is easier to manage when each site has its own count. When you add a retail product, you set the quantity and a reorder alert level for each location, and a stock take asks which location you are counting. The manage retail stock guide has the steps.
You also decide who looks after stock at each site. In stock settings you can choose the same stock owner for every location, or a different person per location, and each owner gets one weekly email listing what is low or out at their site. The stock settings and low-stock alerts guide explains the options, and our retail stock management guide covers the rest of the stock workflow.
Give everyone their own login
A shared password feels quicker until you need to know who changed something. In Clinic Membership, each person who needs the dashboard gets their own login.
Go to Settings, then Team, and scroll to Team logins. Enter their email and, if you like, their name, then choose a role:
- Admin has full access, including clinic settings.
- Staff can manage patients, the calendar and sales day to day, but cannot change settings.
For staff, you can also switch on access to the dashboard and reports if they should see the numbers. Clicking a team member's name opens their panel, where rotas, time off, calendar sync and sales targets live.
For a second site, this is usually the right split: you and perhaps a practice manager as admins, and the team at each site as staff. Nobody at the new branch can accidentally change a setting that affects the main clinic. Check the pricing page for which plans include team logins, and see the team members and staff logins guide for the full steps.
A simple order for setting up a new site
You do not need to do it all in one sitting. This order keeps each step building on the last:
- Add the location. Name, address and, if useful, a buffer and directions.
- Add its rooms and devices. Tie each one to the new site.
- Update rotas. Assign each clinician to the sites where they work.
- Link site-only services. Only if a treatment is offered at one location.
- Set up stock. Add quantities and reorder levels for the new site, and choose its stock owner.
- Create logins. Give the new team their own staff logins before their first day.
- Check the calendar. Filter to the new site and make sure the rooms, people and times look right.
What changes for you as the owner
The biggest change is that the clinic stops living in your head. When a new receptionist starts at the branch, their login, their site's rooms and their site's stock are already there. When you want to see how both sites look this week, you open one calendar instead of making two phone calls.
It also makes the next site less daunting. Once the pattern is set, adding another location is the same seven steps, not a fresh project.
Clinic Membership brings your locations, rooms, stock and team together with your patients, calendar and memberships. Free covers up to 10 patient records. See pricing for paid plans.